Perler Bead Troubleshooting: Warping, Bad Melts, Loose Beads, and Color Issues
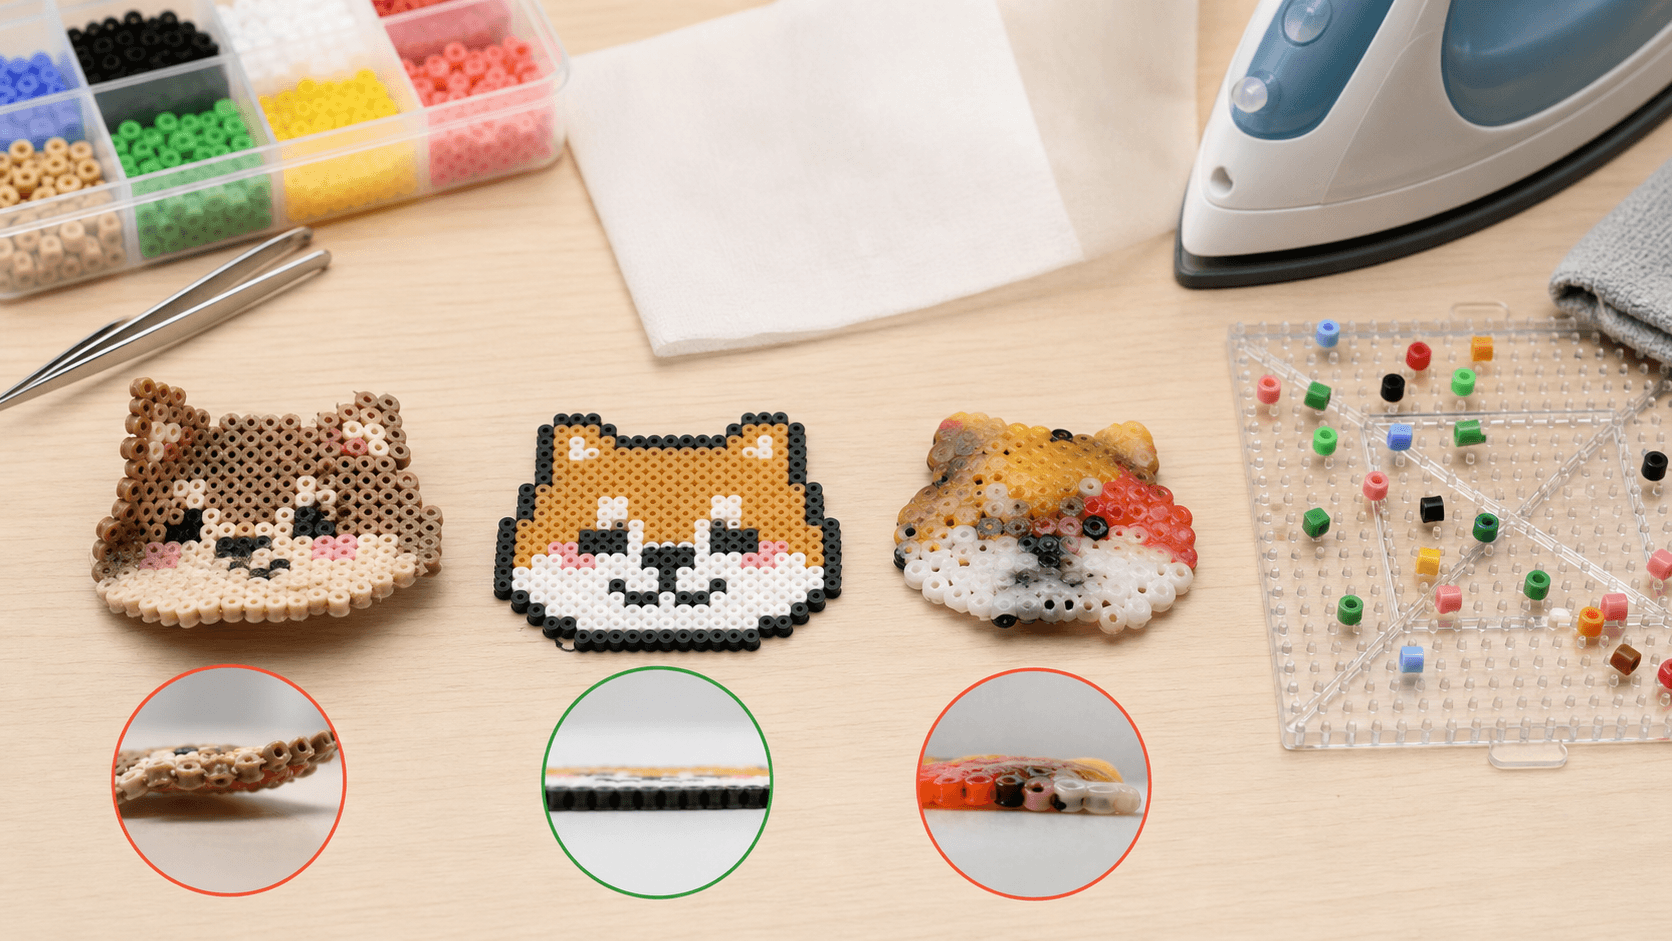
Fix the most common bead project problems: warping, uneven ironing, loose beads, melted pegboards, noisy colors, and tape method mistakes.
このまま作り始める
エディターで図案を作るか、公開ギャラリーから練習用の図案を選べます。
Perler Bead Troubleshooting: The Problems Beginners Hit First
Bead art looks simple, but small mistakes can ruin a project: warped pieces, loose beads, melted pegboards, inaccurate colors, or designs that fall apart during transfer.
Here is how to diagnose and fix the most common issues.
1. Why did my project warp?
Common causes:
- Iron temperature is too high.
- Some areas were heated too long.
- The piece was not cooled flat.
- Heat was uneven across the design.
After ironing, keep the project flat and press it under heavy books for 10-15 minutes while it cools.
2. Why are the beads not fused enough?
If the piece falls apart, it usually needs more even heat, especially around the edges.
Try this:
- Move the iron slowly in circles.
- Spend a little extra time on the edges.
- Avoid pressing hard in one spot.
- Lightly iron the second side for small durable pieces.
Do not solve weak fusion by crushing the beads with pressure.
3. Why did all the holes disappear?
That is usually over-ironing. A flat melt can look great, but it needs careful temperature and timing.
If your goal is durability rather than a flat pixel look, you do not need to close every hole completely.
4. Why did my pegboard bend?
Pegboards bend when they receive too much direct heat for too long.
To prevent this:
- Use the tape method for larger projects.
- Keep the iron moving.
- Avoid high heat on the pegboard.
Once a board is warped, it is hard to restore perfectly.
5. Why do colors look different from the preview?
Screen colors, bead brands, and melted plastic all differ slightly.
Improve color accuracy by:
- Using one bead brand when possible.
- Testing important colors first.
- Reducing similar shades.
- Avoiding subtle gradients in small patterns.
6. Why do I keep knocking beads over?
Usually it is a tool or workspace issue.
Use fine-point tweezers, work on a stable table, and build from outlines or large color blocks first. For large designs, finish one area at a time.
7. Why did the tape method fail?
The tape may not have been pressed firmly enough, or the flip was unstable.
Tips:
- Press the tape with a card or tape roll.
- Make sure every bead is attached.
- Flip with two pieces of cardboard.
- Move confidently when turning large designs.
8. What if the pattern is too hard?
Simplify it:
- Reduce the color count.
- Remove the background.
- Choose a smaller subject.
- Split the project into sections.
- Finish outlines and main colors first.
Completing smaller projects builds confidence faster than abandoning huge ones.
FAQ
Can failed Perler bead projects be fixed?
Many small mistakes can be fixed by reheating a small area, replacing a few beads, pressing the project flat, or swapping a close color. If the whole piece is over-melted, rebuilding is often faster.
Why does the same pattern look better when someone else makes it?
The difference usually comes from iron temperature, parchment paper, cooling pressure, bead brand, and patience during placement. Practice the process on small designs before committing to a large one.
What should beginners check first?
Start with pattern size and color count, then check placement stability, tape method technique, and iron heat. Change one variable at a time so you can find the real cause.
Next step
If your issue is ironing, read How to Iron Perler Beads. If large projects are falling apart, read the Tape Method. You can also return to the pattern gallery, simplify a design in the editor, or choose an easier project from easy cute Perler bead patterns.