How to Turn a Photo into a Perler Bead Pattern
Learn how to choose the right photo, set the pattern size, control color count, simplify backgrounds, and clean up the generated bead pattern.
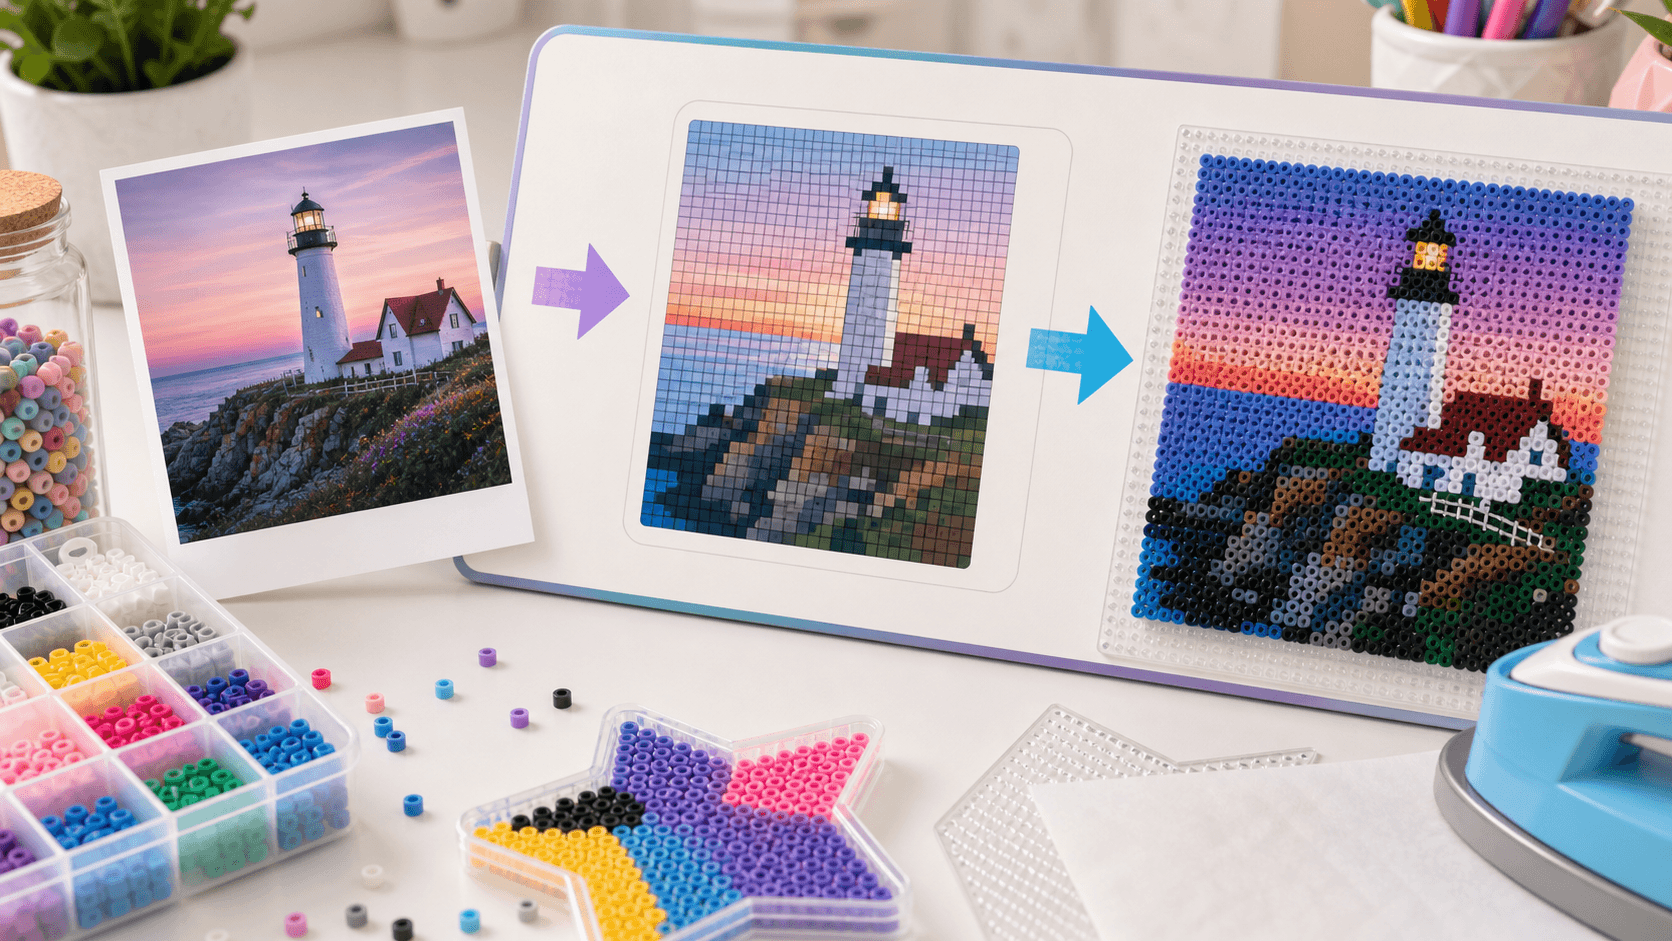
How to Turn a Photo into a Better Bead Pattern
Converting a photo into a bead pattern is not just shrinking the image. A good result depends on size, colors, contrast, subject shape, and how much background detail you keep.
Use this workflow before exporting your final pattern.
In the BeadsCanvas editor, use the photo conversion entry to turn an image into a pattern. If you only want to test size first, you can also start with a blank project using the same pegboard settings.

1. Choose a photo that converts well
Good source images usually have:
- A clear subject.
- Simple or removable background.
- Strong contrast.
- Cartoon, avatar, pixel art, or icon-like shapes.
Very detailed photos often create too many colors and noisy pixels. They can work, but they need more cleanup.
2. Choose a sensible size
The larger the pattern, the more detail you can keep.
Suggested sizes:
- 29x29: icons, small avatars, first tests.
- 58x58: clear characters, pets, and simple objects.
- 87x87 or larger: advanced projects that need more beads and time.
Start smaller if you only want to test the idea.
3. Control the color count
More colors are not always better. Too many colors make the pattern harder to shop for and build.
Good ranges:
- Beginner projects: 8-16 colors.
- Regular patterns: 16-32 colors.
- Detailed large designs: 32+ colors.
If the output looks muddy, reduce the color count or simplify the image first.
4. Simplify the background
Backgrounds can waste beads and distract from the subject. Before converting:
- Crop close to the subject.
- Remove complex backgrounds.
- Use a flat light background.
- Avoid large gradients.
For bead art, a clear silhouette is usually more important than background detail.
5. Clean up the generated pattern
After conversion, open the pattern in the editor and check:
- Eyes, mouth, and highlights.
- Broken outlines.
- Random isolated pixels.
- Background color noise.
A few minutes of manual cleanup can make the final project much clearer.
6. Check the material list before building
Before exporting, look for:
- Colors used only 1-2 times.
- Similar colors that can be merged.
- Main colors that require many beads.
Simplifying rare colors can reduce both cost and frustration.
FAQ
Why does my photo not look like the person?
Photos contain far more detail than bead grids can show. Try a larger size, a cleaner crop, stronger contrast, or an illustration-style image.
Why does the generated pattern look noisy?
The source image may have too many shadows or textures. Reduce the color count and remove background detail.
Can I build the generated pattern immediately?
Yes, but inspect important details first. Automatic conversion is a strong starting point, not always a perfect final pattern.
Next step
Open the pattern maker with a simple image and compare different sizes before exporting.